

Table of Contents
- Why Custom Name Plates for Horse Halters Earn Their Place in the Tack Room
- Brass, Chrome, or Stainless Steel: A Material Comparison Guide
- Custom Tack Name Plate Styles: Fonts, Shapes, and Engraving Options
- How to Attach a Halter Name Plate: Step-by-Step
- Best Practices for Leather Tack Maintenance Around Engraved Plates
- Standardization vs. Customization: The 'Yes or No' Debate
- Sizing, Attachment Hardware, and Tack Compatibility
- Conclusion
- Frequently Asked Questions
Last Updated: September 28, 2026
Why Custom Name Plates for Horse Halters Earn Their Place in the Tack Room
Custom name plates for horse halters are small engraved metal tags, usually brass or stainless steel, that attach to the crown piece or cheek to identify the horse, owner, or barn. They solve a real problem: in a busy tack room, identical bridles get mixed up, and a misplaced bridle at a show can cost you a class.
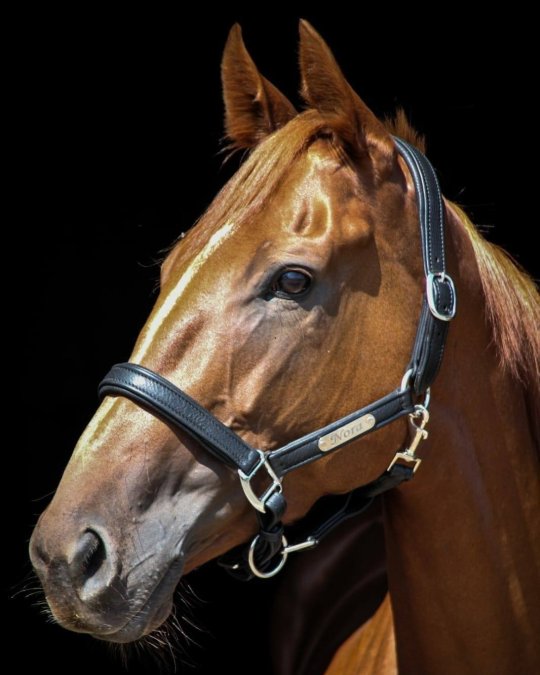
Halter with Nameplate
This guide from MacRider covers what matters when you order: material, engraving options, attachment methods, and leather care around a plate.
Brass, Chrome, or Stainless Steel: A Material Comparison Guide
Brass is the best all-around choice for most bridles: it engraves cleanly, ages into a warm patina, and holds up to daily barn life. Chrome looks sharper out of the box but flakes once the plating wears through. Stainless steel costs more and never tarnishes, which matters in a damp tack room.
Material |
Look |
Maintenance |
Engraving Quality |
Best For |
|---|---|---|---|---|
Brass |
Warm gold, patinas over time |
Polish every few months |
Excellent, deep cut |
Traditional show bridles, halters |
Chrome-plated |
Bright, mirror finish |
Wipe down often |
Good until plating wears |
Budget plates, casual use |
Custom Tack Name Plate Styles: Fonts, Shapes, and Engraving Options
The best custom tack name plate styles balance legibility at a distance with a shape that sits flat on a curved strap. Rectangles and ovals dominate because they distribute pressure evenly and don't catch on reins or a martingale.
- Keep names to 12-15 characters. Beyond that, lettering shrinks and legibility drops fast.
- Put the horse's show name on the plate, not the barn name, if the bridle travels to competitions.
- Add a phone number on the back of the plate if the bridle might ever leave your possession.
- Choose black-filled engraving over plain cut for contrast against polished brass.
- Order a spare plate at the same time. Matching a font and finish two years later is harder than it sounds.
How to Attach a Halter Name Plate: Step-by-Step
Attaching a nameplate takes about ten minutes with the right tools. Work on a stable surface with good light, and never rush the punch.
- Mark the position. Hold the plate on the crown piece, centered and clear of the buckle. Mark both hole positions with an awl.
- Back the leather. Slide a cutting board or scrap wood behind the strap. Skipping this step is how people punch through the far side of the leather.
- Punch the holes. Use a punch one size smaller than your rivet post. A snug fit holds better than a loose one.
- Seat the rivet. Push the post through plate and leather, set the cap, and tap firmly with the mallet until the two halves lock.
- Check the fold. Flex the crown piece over your hand. The plate should sit flat with no lifting at the corners.
Best Practices for Leather Tack Maintenance Around Engraved Plates
Leather tack maintenance around an engraved plate comes down to one rule: keep conditioner off the metal and moisture out of the rivet holes. Both are entry points for problems that shorten a bridle's life.
Two habits make the biggest difference:
- Dry the bridle completely before it goes back on the rack. Damp leather around a plate is where cracking starts.
- Check the rivets every few months. A loose rivet lets the plate shift, and a shifting plate enlarges its own holes.
Standardization vs. Customization: The 'Yes or No' Debate
Standardized plates on every bridle save time and prevent mix-ups, but they cost you the personal touch that makes a show bridle feel like yours. Most riders need both, applied to different pieces of tack. But there is a second half to this debate most guides skip: whether a nameplate helps or hurts the resale value of a high-end bridle.
- A plate dates the tack. A buyer looking at a used bridle sees someone else's horse name, which makes the piece feel used rather than pre-owned. That perception can soften what a buyer is willing to pay.
- A plate limits reuse. A bridle with a 2-inch plate and four holes is harder to resell to a rider who wants a clean crown piece, because the holes cannot be undone. Some buyers will pass entirely rather than deal with patching or covering.
How to decide. A practical approach many riders consider:
- Label the working tack. Halters, stall signs, and everyday training bridles benefit from a standardized format, same shape, same font, same placement, so anyone can grab the right piece in seconds. That is an identification system, not decoration, and it does not hurt resale because the next owner expects it.
- Finish the show tack. A bespoke plate with the horse's registered name and a chosen font is part of the presentation. Keep it small and the engraving restrained. A show ring rewards clean turnout, and an oversized plate on a fine crown piece reads as clutter.
- Think twice before plating a bridle you may sell. If the bridle is a high-end piece you might move on from, consider a screw-on plate or a removable tag instead of rivets. You keep the identification without committing the leather.
Sizing, Attachment Hardware, and Tack Compatibility
Plate sizing and tack compatibility should be decided together, because a plate that fits a halter crown piece will overwhelm a slim bridle cheek. The rule that prevents most mistakes: measure the strap width at the exact spot the plate will sit, then choose a plate no wider than that strap. Measure with the bridle assembled and buckled, not flat on a bench, because leather compresses and curves under tension.
- Slim English cheek straps often run about 5/8 inch (roughly 16 mm) wide.
- Standard English crown pieces commonly sit around 3/4 inch (about 19 mm).
- Wider Western headstalls and many halters run 1 inch (about 25 mm) or more.
- Small: roughly 1/2 inch by 2 inches, best for slim cheek straps and pony bridles.
- Medium: roughly 5/8 inch by 2-1/2 inches, the common crown-piece size for adult English bridles.
- Large: roughly 3/4 inch by 3 inches, for wide headstalls and halters.
- Rivets are permanent. A two-part rivet (post and cap) locks through the plate and leather and will not back out under vibration. Choose a post length that matches plate thickness plus leather thickness so the cap seats flush.
- Screws let you move or remove the plate, which matters if a bridle is sold or reassigned. They loosen with vibration, so check them monthly and consider a touch of removable thread locker on the threads, never on the leather.
- Chicago screws (a screw-and-barrel pair) are a middle option some riders prefer because they sit flat and can be tightened by hand.
Compatibility by tack piece:
- Bridle crown piece: the standard location. Flat, wide enough, and out of the way of rein contact.
- Bridle cheek: works on wider cheek straps, but keep the plate small so it does not interfere with the bit or curb chain.
- Halter: works well, but choose a plate with rounded corners so it does not rub the horse's cheek.
- Saddle: a small plate on the stirrup bar or cantle is common for identification, though it sees more wear.
- Girth and martingale: generally avoid. These pieces flex constantly, and a rigid plate will crack the leather.
Conclusion
Getting the plate right is mostly about restraint: the right metal, a legible font, and an attachment that respects the leather. Choose brass or stainless steel, keep the engraving short, rivet it to the crown piece, and maintain the strap around it. That combination will outlast the bridle.
Frequently Asked Questions
Where do you attach a name plate on a horse bridle?
Most riders mount the plate on the crown piece, the strap that runs behind the horse's ears, because it stays visible without rubbing against the browband. Some attach it to the cheek piece instead. Check your show association's rules first, since a few competitions specify an exact location for identification plates on bridles.
Should I choose brass or chrome for my bridle name plate?
Brass develops a warm patina over time and is easy to engrave, making it a common choice for everyday barn use. Chrome and stainless steel resist tarnishing and hold a bright shine, which suits show ring presentation. If you clean your tack often and want low upkeep, stainless steel is the practical pick.
Are custom name plates required for horse shows?
Requirements vary by discipline and sanctioning body. Many schooling shows and hunter/jumper competitions do not require them, while some breed and driving classes ask for visible identification. Check the prize list or rulebook for your specific class before ordering, and confirm any font, size, or metal restrictions.
How do you clean and maintain engraved bridle plates?
Wipe the plate with a soft, damp cloth after each ride to remove sweat and dust. For brass, a small amount of metal polish restores shine; for chrome or stainless steel, a dry microfiber cloth usually suffices. Avoid abrasive pads, which can dull engraving. Recheck screws and rivets monthly, since vibration from riding can loosen attachment hardware.